23 February 2019

Cruel Seas - Finishing Off the PT Boats

Edit: you can see part 1 here.

As discussed at the end of the last related blog post (see here), I gave these PT boats a heavy wash of both Vallejo Woodgrain (70.828) and watered down Black (70.950). I also added the (tiny!) American flags to some of the boats, using the flag sheet that they came with.

These were pretty easy to apply: cut the flags out with roughly a 5mm border around the design, folded along the hoist, added a small dab of PVA, fold in half, let that dry, cut out with scissors, glued into place with a small drop of super glue and then painted the edges (red and blue).

Back to the wash; I am very happy with how they came out on the top surface:


But I think I was a bit heavy with the streaking with the brown ink along the sides:


A day or two later I am not concerned now with having to fix this up as you can hardly see it when the boats are laid out on the table. Overall I am very happy how quickly I got this project done from when I purchased them to getting them ready for a game. (Okay, I've got two more to paint, but these don't have to be finished to get a decent sized game in.)

19 February 2019

Cruel Seas - Painting PT Boats

Edit: the first part can be found here.

I decided as this was a small project I wasn't going to buy paint to match the exact military colours of the PT boats. However, after a bit of googling, I realised this wasn't really an issue as colours varied wildly (including the effects of weather)! I started off with Vallejo German Fieldgrey WWII (70.830), but it had way too much green in it (even when I factored in highlighting), so I painted over a coat of London Grey (70.836). Much better.


For a (very) brief moment I considered painting some of the boats in dazzle camouflage... but just like the American crews I gave up when I realised how difficult it would be. It looks pretty amazing though.


The base coat was followed by a few heavy dry brushes with white (70.951) mixed in. The weapons were painted black (70.950).


The cabin windows and the crew were painted Dark Prussian Blue (70.899) with some white highlights, with a small dot of Flat Flesh (70.955) for the faces. The missiles were painted a mix of metals and black to differentiate them on the table, including a set to match the ones on the Elco with silver bodies and bronze (70.998) tips.


For markings on the Higgins boats I saw something on the History Channel's documentary (it's on YouTube) on PT Boats that was simple but would stand out.


The decals were from some spare Flames of War Sherman tanks I had and were easy to apply on the flat surface (though I still used decal softener).


I also cut down some 1/72 decals I had for a Flying Tigers P-40 that was a few decades old now. It needed a few goes with decal softener due to the curves in the bow's hull, but I think it's come out alright.


Since taking these photos, I have given these both a heavy black and brown wash, and will post photos once I varnish them and glue their flags in place. Hopefully in the next few days.

Edit: the third part can be found here

18 February 2019

Last Game I Played - Tupi Battle the Texcala and Cruel Seas

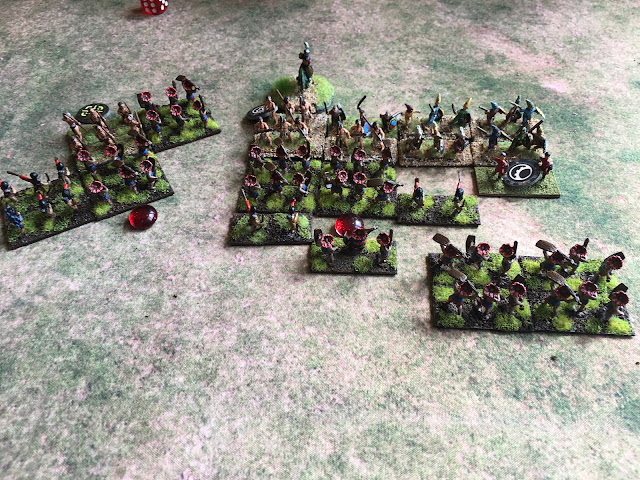
ADLG
Club day at the League and the morning game was 200 points of ADLG with my Tupi (#277) against Andrew's Texcalas (#273). I used the same army list as last month, using the tactic of trying to turn the flanks before charging in the middle. I made a few errors in match ups, but I was able to give Andrew a close enough game, breaking when he was only three units away from breaking himself. It was also amusing to see how poorly his Spanish ally contingent performed. I think the first three turns he rolled '1' for the activation die.


Cruel Seas
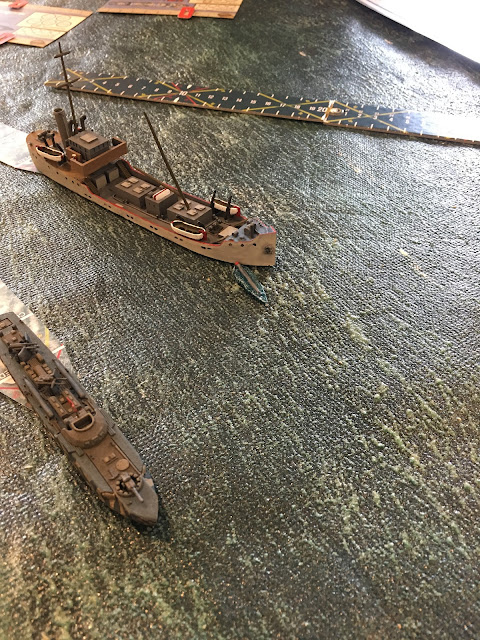
After lunch it was an introduction to Warlord Games' Cruel Seas with Mark and the collection he painted over the Christmas break. Lovely little models, full of detail.

The first game was Mark running an S-100 class Schnellboot against my two Vosper Type I MTBs. Setting up on opposite corners, my objective was to escape off the corner the Schnellboot started from.

It plays fast.

Mark took out one of my Vospers with the special "park 5cm next to me special and unload with all your weapons" (that I used to devastating effect in game two). It’s a powerful tactic as the target ship can’t easily strike back (having already activated, or if it hasn’t, it has to move before it can shoot). I wasn't able to take out the Schnellboot in the scenario's five turns, so lost.


The second game had me fielding Vospers Type IIs, upgraded with more weapons and damage capacity. This time I also had the use of torpedoes. They didn't fail me.

The scenario has the Germans escorting a tanker, which has 80 damage capacity so needs two torpedoes to take down. This really means three to four should hit if you take crew skill and duds in consideration (I haven’t done maths on this) to be sure it sinks (in addition to your ship's guns).


I was lucky that my guns and only one torpedo were enough, as the moment you pass the tanker your turning circles are a bitch. So you need (like X-Wing) to be careful in that first pass.

Finally, as the League's new home is an RSL club, the Queen's image is almost in every room. This is over the tea station the games room.


She seems like a happy warmonger. (She's German after all.)

10 February 2019

Cruel Seas - Gluing Together PT Boats

So I was weak. I have already been distracted by something shiny and new.

Last week I bought the January edition of Wargames Illustrated that included some articles of interest, along with two free US PT boats for Warlord Games' Cruel Seas game. I liked how well they went together that a day later I bought the US Navy PT Boat Flotilla box set to give me a total of four Higgins and four Elco PT boats.

Overall they were pretty easy to put together, though due to the small parts there was more flash than I would've liked. They also didn't include an instruction sheet, so I had to watch some YouTube clips and search through historical photos to see which way round the torpedoes and rocket launcher were meant to be positioned. But these are just minor criticisms once you see what the flotilla looks like all lined up.


One thing that wasn't too easy to do was add a magnet (as I'll be storing these in a tin) to the bottom of each boat. Although there was a cavity, this was sloped on an angle. The simple solution was to add a little block of card about 7x7mm to the deeper end and then glue a strip of sheet magnet strengthened with card so that it was flush with the bottom of the boat. (The photo above also has all the boats with a magnet strip added.)


Painting-wise I'll keep things simple - the Higgins and two of the Elco boats with be in a simple grey scheme similar to this:


While the remaining two Elco boats will have additional camouflage:


Hopefully they'll be done in a few weeks. I also have my first game of Cruel Seas lined up next Sunday and have been watching a few of the play through videos that are online.

Edit: you can see part 2 here and part 3 here.

01 February 2019

LAF Build Something Contest 2019 - Part 4 (Knees and Sushi Lids)

As stated, I've glued toilet tissue paper to the head (and tested it on a leg). Here's what it looks like.


I like the look it achieves, but I'll need to start gluing from the bottom body part and then move to the top to achieve the right look with the overlapping. I think (hoping?) it's going to paint up really well. The current plan is dark greys for the body, with the face and/or head like the cat mascot I posted previously. I still don't know if I should paint over the eyes or leave them (with a black Blade Runner style eyeliner).

I have also made the knee joints - they will be the only "internal" parts showing, as one leg has been ripped off and will also have the guitar string wires in a mess spilling out from both parts.


They were made by cutting up the tube you get with a roll of dog toilet bags, adding a circular cap to each end by gluing a larger rectangular plastic sheet and then trimming it to size. The final step was to use a simple hole punch to create the joint cap. This will be easier to see when painted (as the plastic is semi-clear).

Finally I'm needing help with the back outlet ports. They're just the lids from soy sauce fish shaped bottles you get with sushi takeaway (https://www.techly.com.au/2016/08/12/techly-explains-whats-deal-little-soy-sauce-fish-comes-takeaway-sushi/) that may or may not be available in your part of the world. I've never used them before, but while having some sushi the other day I realised the lids would be useful for this build. They will have guitar string wires attached to the end and I don't know if they should be lined up vertically or horizontally.

 
Which do you prefer?