30 September 2013

15mm Tlingit from Eureka Miniatures

Painted and finished in September:


Some lovely sculpts for 15mm Tlingit North American Indians from Eureka Miniatures for an upcoming DBA tournament at the Monday Knights. I bought these almost six years ago, and finally got round to painting them on a whim last weekend.

They won't perform great (being x10 3Bw and x2 2Ps elements), but I think they look cool.

Available here:
http://eurekamin.com.au/index.php?cPath=87_102_729&sort=3a

29 August 2013

Mara (Tibetan Demons)

I received some of the Garden of Kama's Mara miniatures. They're Tibetan (Buddhist) demons, inspired by this image:


They are about 40mm tall and I put them on 40mm bases. Lovely detail sculpted by Andrew May.


I painted these with a lot of washes and used white and gold to touch them up. No idea what I'll use them for - but they paint up really well and the detail on them is very good.
 

They're available from the same company that produces the Tékumel Project range of 28mm miniatures. The complete set sells for CAD30 including separate heads and hands. Tékumel Club discounts apply even though they are part of the part of the Garden of Kama range and so not strictly Tékumel: https://lohwand.blogspot.com/p/the-garden-of-kama.html.

Ordering is a little complicated, but as stated you can get a discount on them through the Tékumel Club: http://thetekumelclub.blogspot.com/p/tekumel-club.html.

Definitely would like to see more in this style for a setting almost completely ignored.

21 August 2013

Bolt Action - Soviets and Germans AAR

On Sunday at the League Mark ran an introduction game of Bolt Action, mainly to show off a lovely building from Crescent Root Studio (http://crescent-root.com/index.html), this time a laser-cut MDF warehouse.

The setting was the Eastern Front, late in the war. 1000 points a side, with German and Soviet forces being controlled by three players each - Jan, a Horvat brother and myself for the Germans, with Tyler, the other brother and Mark commanding the Soviets.

From memory the Soviets had 3 squads of infantry, a squad of sappers, a squad of raw recruits, a ZiS AT gun team, a mortar team, a leader and a T-34.

The Germans had 3 squads of infantry, a squad of Fallschirmjäger, a PaK team, an HMG team, a leader, a medic and a StuG.

The objective would be the taking of a small, sleepy hamlet in the Ukraine:


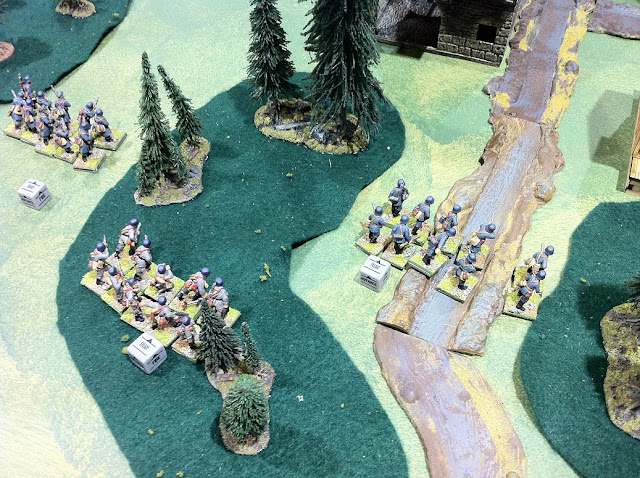
Deployment was by selecting dice (either marked as German or Soviet) blindly from a cup to see who had to deploy a squad (initiative is also determined this way unit by unit in a turn). The Germans came on from the west, the Soviets from the east. Both sides massed their forces on the southern flank:


The German forces decided to throw caution to the wind and run to the cover of the buildings as quickly as possible:


It also quickly became apparent that the armour would try and nullify its counterpart if possible:


The Germans continued their objective of taking the buildings, streaming into the warehouse:


On the northern flank both sides were a little more cauitous, with the German squad having to avoid mortar and AT fire:


The German advance continued, with no expected ambushes from the Soviets occuring:


The Soviets were a little slow in advancing, but this allowed their support weapons to be set up earlier to cover the advance and cause damage earlier:


The Soviets were reluctant to leave the cover of the tree line, taking some casualities (but dishing it out to the exposed Germans as well):


The duel between the armour was eventually won by the T-34, much to the cheering on their side:


 This also gave the Soviet infantry some confidence, storming across the open ground:


They were quickly dispatched by the German infantry in the woods and the PaK (which was also doing a good job of keeping the T-34 sulking behind the woods):


The northern flank saw the Soviets refuse to seek safety in the buildings, instead this allowed them to inflict heavy damage on the German infantry (who were in the building, and not the open):


The Fallschirmjäger risked the open ground to try and take out the HMG, as time was getting close. Unfortunately this gamble didn't pay off and they were gunned down:


The final turn saw the HMG, Leutnant and an infantry squad finally make it to a commanding position in the top floors of the warehouse:


They were able to suppress multiple Soviet squads and cause some damage, but it was too late - as time was called and the Germans had sustained more losses than the Soviets.

A fun system, which definitely has me thinking about painting my 28mm WWII miniatures that haven't been inspired to get a game happening.

After the battle Mark noted that one of the highlights was when one of Tyler's sole surviving sailors from a badly shot up Naval Squad went beserk (i.e. he blundered by rolling double 6 on his order dice) and opened up on the Russian Lieutenant killing his aid!

19 August 2013

French Foreign Legion Beseiged by Rif Tribesmen AAR

Mark had recently bought a North African fort from Crescent Root Studio (http://crescent-root.com/index.html) and had been itching to show it off. This also allowed him to use some under-utilised French Foreign Legion and Arab figures in his collection.

The scenario was simple (take the fort!), and using Ganesha Games' 'Songs of Drums and Shakos' (a set designed for Napoleonic skirmish games), the stage was set between "cheese-munching surrender monkeys" and "revolting Arabs" (in this case some Rif tribesmen) commanded by myself, Martin and Tyler.

The Arabs were in three groups of 8 riflemen, 3 swordsmen and a leader, a hero (a version of Lawrence of Arabia) and a banner bearer. Facing them, the Legion had two groups of 8 riflemen, a leader, a bugler and a lieutenant.

The three groups of Arabs attacked from the west, south and east:


From the south the banner bearer would provide a central rallying-point for the assault on the main gate:


The group from the east would attack in an effort to scale the walls, completely failing to recognise the wooden door at the north corner:


When the tribesmen attacked at dawn, the legionnaires in the fort steeled themselves for the fight ahead, for things would not be easy:


Particularly as the architect of this fort was insistent on large windows on the ground floor:


After a few turns the attack was starting to falter, with the east and west groups failing to really understand the concept of charging towards the enemy:


The walls were breached! But the rigorous training of the Legion showed and the interloper was dispatched:


Finally the Arabs gave up in attempting group moves (typically 4+ on a D6 if the leader activated), and it was every man for himself to reach the walls of the fort (typically 5+). The cunning tactic met with limited success:

The west and southern groups tried a coordinated attack, but again - the low quality of the men was telling as they failed to get over as one:


Lawrence managed to enter the mess hall with a few men, but in turn the Legion had had time to mass their men. A bitter struggle ensued:


Meanwhile in the courtyard there was the possibility of a small group of tribesmen getting a foothold, but again this was contained:


Elsewhere the tribesmen from the east were in danger of also taking over, but the lieutenant rushed across the courtyard to try and stop this breach:


Things where looking grim indeed in the courtyard, while the battle in the mess hall continued:


Outside in the desert the last of the tribesmen were reaching the walls, except for "Swifty" (who failed to activate until the last two turns of the game, and the only running figure on the table!):


In the end the game was won by the Legionnaires, who spread their limited resources with success, taking down Lawrence and routing the tribesmen back over the dunes:


Another fun game that came down to the wire. 'Songs' (and other Ganesha Games' rules) provide a fun set of rules you can't take too seriously - perfect for club multi-player games.

23 July 2013

Siege of Lothlorien - War of the Ring AAR

I have been playing a little bit of War of the Ring (Games Workshop's take on massed battles in Tolkien's Lord of the Rings universe) lately. It's a nice elegant system, all contained in one rulebook (though there is one extra army book with more specialised army lists). I like it as it flows nicely and I get to use most of my LotR miniatures (blue chip investments). The only modification needed (as with many GW games) is to limit the use of characters. A common modification in our circle is to have one character for each full 1000 points in play. Size wise 1000 - 2000 points gives you a good game in a couple of hours.

Bruce K, Brad H and I played a 1500 point game at the July League of Ancients wargaming club meet (I commanded the forces of Mordor). The following armies were used:

Elf and Dwarf Army
Radagast the Brown - 160 points

Wood Elves with longbow - 135 points
x3 companies (120), Longbows (15)

Wood Elves with longbow - 135 points
x3 companies (120), Longbows (15)

High Elf Archer Regiment - 300 points
x5 companies (300)

Galadhrim Knight Regiment - 250 points
x5 companies (250)

Dwarf Warrior Kinband - 120 points
x3 companies (120), Dwarf Captain (50), Shieldbearer (25)

Dwarf Warrior Kinband - 120 points
x3 companies (120), shields (free)

Dwarf Archer Kinband - 105 points
x3 companies (105)

Ent - 125 points

Easterling and Mordor Army
Khamûl the Easterling - 125 points

Easterling Kataphrakt Cohort - 205 points
x3 companies (105), Easterling Captain (50), Banner Bearer (35), Easterling Drummer (15)

Easterling Archer Cohort - 70 points
x2 companies (70)

Easterling Cohort - 325 points
x3 companies (90), Easterling Captain (50), Banner Bearer (35), Easterling Drummer (15), Dragon Knight (35), War Priest (100)

Morannon Orc Warband - 185 points
x4 companies (80), shields (20), Orc Captain (50), Banner Bearer (35)

Morannon Orc Warband - 185 points
x4 companies (80), shields (20), Orc Captain (50), Banner Bearer (35)

Warg Rider Warband - 75 points
x3 companies (60), shields (15)

Mordor Troll - 100 points

Mordor Troll - 100 points

Mordor Troll - 100 points

The battle generator in the book makes you roll for both objectives and deployment. We rolled Seize the Prize for the objectives (5 fluid counters that are seized by the units, but can be lost during the battle) and Battle for the Pass for deployment (deploying length-wise along the table).

Deployment:


Elf and Dwarves: dwarf bowmen (right flank), Wood Elves in the forest, High Elves, knights, Wood Elves, Dwarves (left flank). The Ent was in ambush (and never came out of his woods). It had nothing to do with his general forgetting about him 😛.

Easterlings and Mordor: trolls (left flank), Easterlings, Easterling archers (in a walled field), Easterling Kataphrakts, Morannon orcs (x2) (right flank).

The game was a race to the one lone objective in the middle of the table, which the elven knights rushed out to seize in turn one (see photo above). The forces of evil knew that they had to rush forwards to try and grab these objective(s) back, and to avoid the hail of arrow fire that would surely rain down on them. The plan was for a right flank punch, with the trolls set free to cause chaos on the left flank.

The elves rained a hail of arrows down on their enemy, but their low strength and high toughness of the orcs and trolls meant that there wasn't many deaths before the lines hit.


During the magic phases though, the forces of good did manage to banish Khamûl which redressed the balance to some extent.


On the left, only one troll was taken down before they reached the dwarves, who in turn died in droves.


This was all a side show to the main battle on the other side of the battle, where the fifth objective changed sides a few times and eventually was seized off a unit of orcs by the dwarves for a marginal victory by the forces of good in the last turn of the game.

We stumbled through the game a little, but considering it had been a few months (and the evil commanders have only played a few games - all this year), we were able to enjoy ourselves and not forget too many rules.

I highly recommend the game to those looking to expand from the LotR skirmish game, and also to those (with a few modifications) looking for a massed battle game for historical battles.

20 June 2013

Golden Die - A Secret Agents AAR


On June 16 2013 a group of us joined together at a League of Ancients meet in Melbourne for "Golden Die - A Secret Agents Game" designed and run by Jan. The game was originally planned for Little Wars Melbourne 2013.

Mission:
The stolen European rocket has been identified on surveillance photos taken recently by a navy plane flying over a remote island in the southern pacific. We assume Dr X is manufacturing atomic material with the help of a group of abducted scientist and plans to launch the rocket using his newly developed X-rocket-fuel. You will be dropped off in a native village and make your way through the jungle towards the launch site. Obtain the formula for the X-fuel, destroy the atomic manufacturing plant, gain intel on Dr X’s other lairs (most likely stored on data tapes) and free the scientists and prevent the launch of the rocket.

Cast of Characters:
Agent J (Shaft), Close combat specialist - Bruce
Diana Briggs (Diana Rigg), Kung Fu specialist - myself
006 (007), a gentleman - will never shoot a lady - Lon
Lord Smythe, tech specialist - Mark
Jason Prince (Jason King), reroll golden dice - Richard
Ian Flaming (Ian Fleming), medical knowledge - Tyler

Some of the Villians:
Dr X:

Dr X's goons:

Bikini babe:

Crocodile:

Russian henchman:

Fembot:

Rules Overview:
The rules were designed by the GM, Jan, and were a simple mechanic based on a D6 for convention play. Each player had three actions per turn (move, shoot, dodge, etc) but couldn't perform an action more than twice. In addition to the normal dice, each player also had a Golden Die which acted as a super reroll die.

Each player had a number of wounds that if you had taken too much damge, the number needed to succed at certain actions would increase to reflect the dificulty in suceeding while you were bleeding everywhere.

The beginning of the mission, with our secret agents just on the other side of the river of the evil Dr X's secret rocket lair:


The rocket waiting to be assembled:


And it won't be easy to get to, as it's heavily guarded:


By Dr X's minions who are ready for action:


Back to our secret agents, who encounter a gang of bikini babes with samurai swords and machine guns:


All, bar one, are dispatched. The survivor is taken to one of the huts to be "interrogated" for a couple of turns by 006. This is when the rest of us had a feeling we wouldn't be able to rely on him to stop Dr X. The other agents leave him behind as they punch their way on through. 006 might have had the right idea though, as the jungle and river turn out to be crawling with giant carnivorous plants, wild dogs, huge snakes and hungry crocodiles.

Eventually though, one by one, our agents make it across the river. Mr Prince is not too impressed he had to get his suit wet:


Some of the men get "that feeling" that one of the warehouses has a damsel in distress:


And call out to the Russian goons that they should come out and fight:


Mr Flaming and 006 climb the roof of one of the outhouses as it offers a clearer vantage point to shoot from... and to be shot at:


This works in 006's favour, as the elevation allows him to jump onto the Russian goons declaring "That's the problem with you Russians, always bringing guns to a foot fight."

These actions are not stopping the technicians from assembling the rocket:


The gun fight between the minions - not to mention Agent J taking the right flank and facing the flamethrower maniac ALONE (why do these things always happen to the token?!) - draws out a scientist with some lovely fembots:


"Easy!" we all think, until their friend joins the party:


006, going at it alone (AGAIN), gets to the unguarded warehouse where our damsel is tied up:


No sooner is the President's daughter untied does she quickly make a break for it, she has heard of 006 and his collection of STDs:


Mr Prince and Lord Smythe wish they were chasing a girl, instead of being chased by an angry iron man:


Mr Prince's clever ability of taking on the robots single-handily allows Lord Smythe to fire his pen missile launcher at the rocket, successfully disabling it, and allow Diana Briggs to get healed from almost certain death by Mr Flaming for a second time:


The final scene sees Lord Smythe confront Dr X (not before having the French scientist pour acid over his face), and just as he's about to kill Dr X, Agent J crashes through the back window and takes him out instead:


Was a very fun game, lots going on, plenty of bad accents and great one-liners.