Showing posts with label WWI. Show all posts

08 September 2021

Naval Wargaming Splash Markers

During the Battle of the Denmark Strait anniversary game I realised I really wanted better looking splash / blast markers for naval wargaming. Nic suggested Irregular Miniatures' 'Two explosions and two shell craters' (code GWV14) which are also available from Eureka Miniatures (code IRR-GWV14).

Designed for 6mm WWI wargaming, these are perfect for naval games and were very easy to paint up (black undercoat, heavy grey dry brush, light white dry brush, white highlights).

I have another 10 (in both sizes) that I'll paint up black to use for land warfare. Really happy how easy these were to create. With the current lock down due to Covid restrictions, I have no idea when I'll get to use them.

03 August 2019

Medium Mark A Whippet and WWI British Tank Crew

I have a list of my painting goals for 2019 (see here) and it was filled with "anything that's shiny and distracts me". This is one of those shiny things.

While I have a load of 28mm late WWI Germans / Freikorps to paint, I decided after the Foch game a few months ago to paint the Whippet tank and British tank crew I had instead. Mainly as a test to see how WWI would paint up and that this was a self contained project.

The tank (picked up in early 2014) is from 1st Corps and is a lovely piece - nice chunky detail in the resin hull while also having fine white metal details in the four machine guns. It got a quick coat of Vallejo US field drab (70.783) with yellow ochre (70.913) mixed in for the highlights. Then gunmetal (70.863) for the tracks along with white (70.951) and flat red (70.957) for the markings. Then plenty of black and brown washes to weather it.


I am still planning on writing or painting on the front panel, as I am intrigued by the story of "Musical Box":

http://overlord-wot.blogspot.com/2013/07/black-box.html
https://stevesmith1944.wordpress.com/2018/08/08/musical-box-writing-a-wrong/


Every tank needs a crew, and I got these Old Glory Miniatures sculpts from the second hand stall at Cancon last year, with the tank corps staff officer being from Warlord Games' British LDV section set. The first are more than a little ropey, but good enough.

Colours used for the uniform was and base of Vallejo brown violet (70.882) highlighted (heavily) with English uniform (70.921). The helmets were brown violet (70.882) with yellow ochre (70.913) mixed in for the highlights and the gasmask bags were stone grey (70.884) with white (70.951) mixed in for the highlights.


While I could've spent more time with shading and highlights, I think WWI miniatures can be a little more unpolished to reflect the subject.

I have since started painting the early war Belgians I have and thinking about how I want to paint the late war Germans. The former may be a little cleaner, but the Germans will probably get the same treatment as these British.

19 May 2019

WWI Skirmish with Foch and more DBA Sumerians

The League of Ancients meeting was a week later than usual due to the Easter long weekend, and Jack G was keen to give Foch a try as we plan our post-WWI revolution games set in Eastern Europe.

Foch is a free adaptation by Pierre Aymeric for using Osprey’s The Men Who Would be Kings to game World War One (and is available here: https://lesperegrinationsdunainblanc.blogspot.com/2018/05/adaptation-tmwwbk-premiere-guerre.html).

Jack supplied both armies, where I commanded Austrians and Jack fielded a British force. As it was a training game, the units were smaller than the normal 12 (to accommodate Jack's collection) of around 9-10 men and we played around 24 points a side (the normal TMWWBK size) as opposed to the 36-48 points Foch recommends. I had three units of 9 men and an HMG, while Jack had troops with better morale, but an LMG instead of an HMG. I only remember what my leaders' traits were, two were Inspirational (may reroll failed rally rolls) and the third was a Terrible planner (limited ammunition supply). These definitely added a great flavour to the game without adding too much complexity.

Finally, the mission. To avoid a straight pitched battle, we decided to play the first scenario (Just Passing By). This forced us both to move and get me to learn the mechanics.

The game became a one-sided affair as I deployed my HMG in a commanding position on a hill and swarmed my infantry units forwards, concentrating fire when possible. Jack suffered for this (he also had a lot of unlucky morale rolls). I eventually wiped out his army.


I loved the game - was quick to pick up and I think will work for us as long as we have an HMG each and play with the minimum recommended army size of 36 points. The flavour of small-scale skirmish is definitely something that appealed to me. I also realised when I got home that a small 1914 Belgian collection I had in the lead pile was enough to field as 36 points, which was a nice bonus.

The afternoon saw more DBA games (round 4 of the GTA:Biblical campaign) with my Sumerians taking on Peter S's Philistines (I/29) in a practice game, Stephen C's Hittite Empire (I/24) and Damian P's Mitanni (I/19). I won against Stephen and lost to Damian, which meant my provinces didn't change hands.


I really need to finish off the rest of the army so I can photograph them up close. In particular I will also need to give the exposed flesh parts a brown wash - they are way too pale!

22 December 2018

Last Game I Played - Battle of Amiens (1918)

For the final meeting of the League of Ancients for the year, and the last to be held at the German Club Tivoli (before the move to the Caulfield RSL), Mark ran one of his large multi-player games. This time it was in the closing months of First World War on the Eastern Front.

Historical Background
Starting in July 1918 with the Battle of Hamel, John Monash’s Australian Corps commenced to roll back the German advance from the (by then petered out) offensive of the Kaiserschlacht. This set the stage for the ultimate counter strike of 8th August, 1918. The Australian Corps and the Canadian Corps spearheaded the attack on the German Second Army south of the Somme in the Battle of Amiens, which was the opening phase of the Allied offensive (later known as the Hundred Days Offensive) that ultimately led to the end of the First World War.

By 11:00 the Australians and the Canadians had advanced three miles along a front of almost 15 miles wide. The speed of their advance was such that a party of German officers and some divisional staff were captured while eating breakfast.

By the end of the day over 13,000 Germans had surrendered with some 3 or 4 thousand other casualties against Anglo-Australian-Canadian casualties of about 8,000. But this was only the beginning of an offensive which would eventually break through the Hindenburg Line and force Germany to seek an armistice. Erich Ludendorff himself described the day as the "Schwarzer Tag des deutschen Heeres".

German Briefing
Germans from a battered Stellungsbataillon (trench battalion) await the inevitable Australian counter attack after a successful incursion by Stosstruppen in this area a few days earlier. Suddenly all hell breaks loose as a bombardment rocks the front line. Through the exploding crash of the artillery shells an ominous mechanical clanking can be heard approaching from the west together with some bizarre cries which sound a lot like ‘Cooo-eee!’, but what can this mean? Someone had best get those verdammte Stosstruppen on the field telephone and order them to send up reinforcements quickly!

Kompanie Einz and one machinegun section are manning the forward line of trenches. Kompanie Zwei and one machinegun section are manning the second line of trenches. Kompanie Drei is in reserve. A reinforced platoon of Stosstruppen are hidden in concealed deep dug-outs somewhere in our lines. Our mission is simple, hold the line or inflict enough casualties on the enemy assault troops to stop them breaking through.

Kompanie Drei may not be brought into play until at least the start of the third German move if the Oberst passes a command roll, and it then moves onto the table from one of the trench entry points.

Report from the Left Flank
I took command of Kompanie Zwei and a machinegun section on the left flank, seen deployed at the bottom right of the photo below.


They started the game dug in along the second line of trenches:


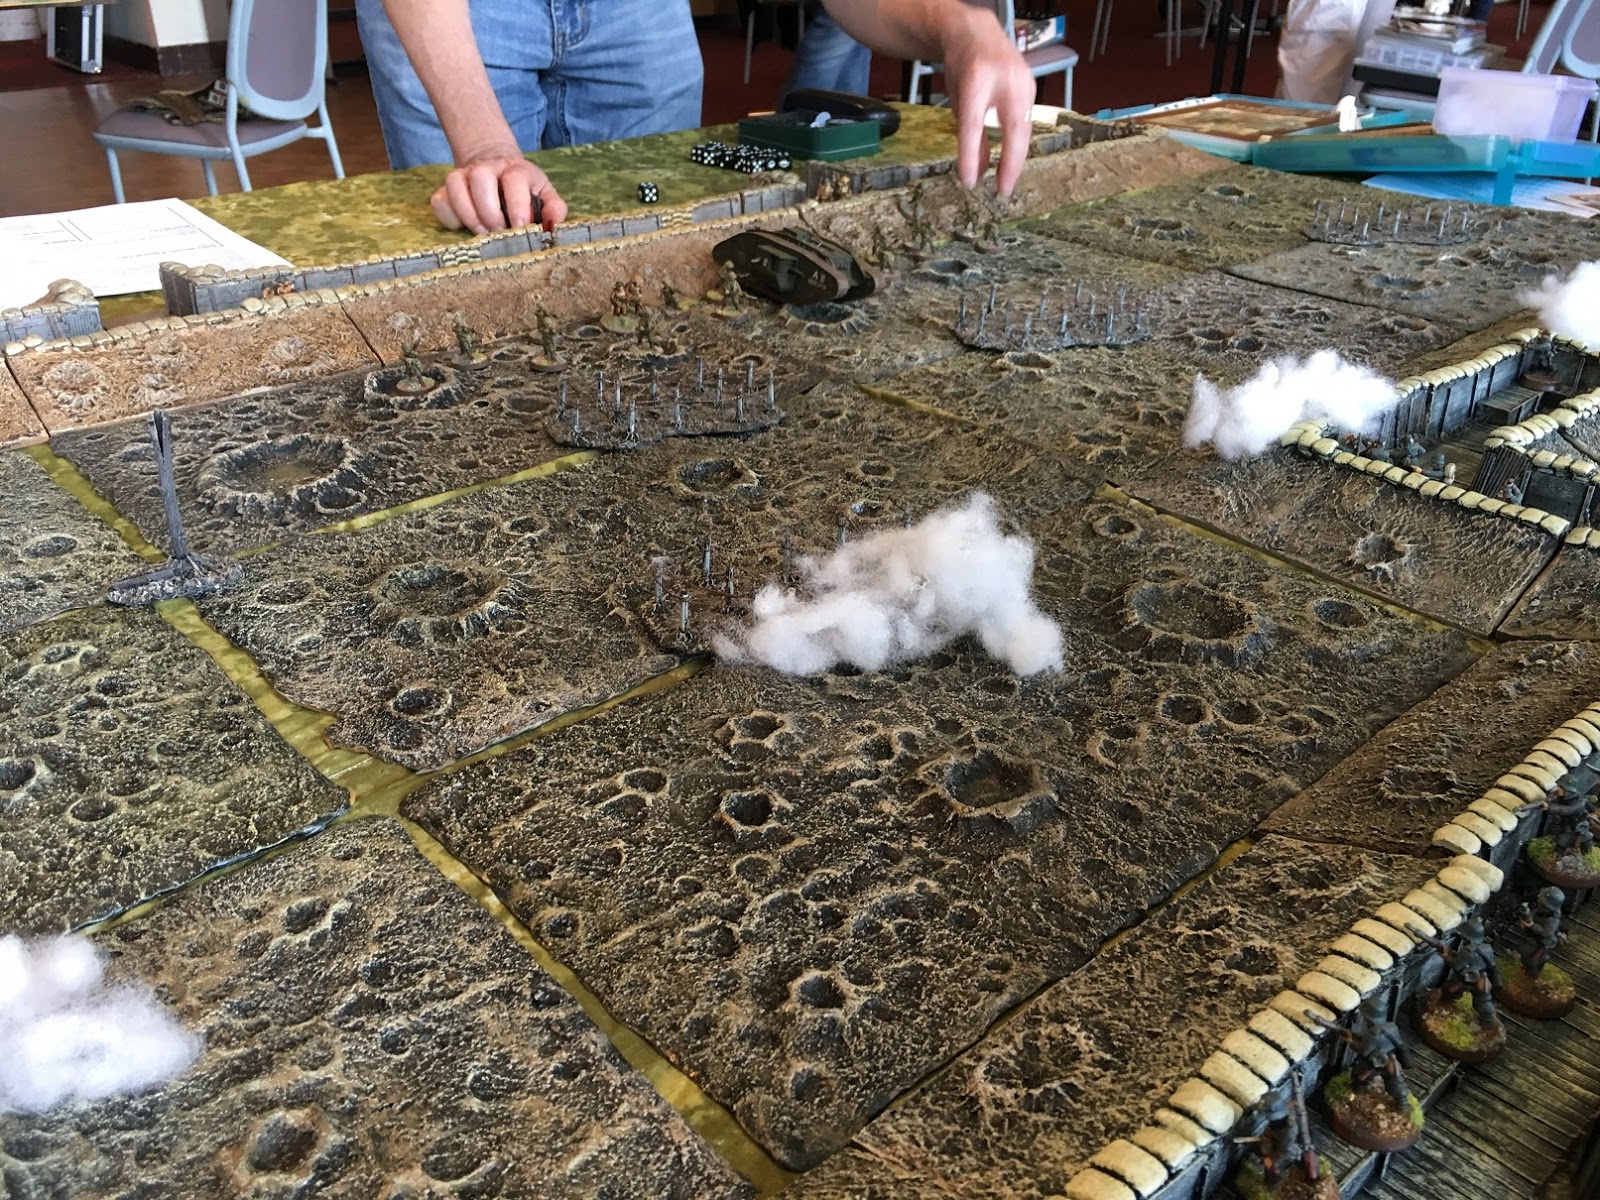
As the creeping barrage was rolling towards our line (yes, that's a Mark IV male tank in the background):


But it looked like it was so far back I decided to jump out of the second line trenches and occupy the first line trench to deny them to the Australians that were running towards our lines. Unfortunately I missed the part that the smoke markers above were the back of the 12" wide creeping barrage (in my defence I was getting a beer), and as I was stuck in the open I had to roll to see if I took any S4 hits. I was lucky and took only two casualties before running back to my starting position.


As the barrage passed our lines we were able to open up with our machine guns and start inflicting some casualties of our own, but not enough (even with special ammunition our 7.7cm field gun was unsuccessful in knocking out the Mark IV).


Our reinforcements arrived, plugging the gaps in our lines (mainly the right flank).


But it was too late, with the right flank having taken a severe beating we were stretched too thin and the trench lines were conceded to the Australians as they flanked us within the second line trench.


A hard fought win for Bruce and Martin M. While Django, Martin O and myself were left wondering where we had gone wrong (the successful pinning of the Mark IV by the field gun, instead targetting the infantry in the open meant we didn't have to deal with its weapons).


Merry Christmas and all the best for the New Year.

12 December 2018

Things I Love - 58ft Towing Lighters

While searching for something completely unrelated on Google, I stumbled upon this lithographic print by Keith Ferris:


The description for this is:
The Royal Flying Corps launches a Sopwith 2F.1 Camel as a surprise for Zeppelin L.53.

The Sopwith 2F.1 Camel flown by Flight Sub Lieutenant Stuard D. Culley lifts from a "lighter" towed by the British destroyer HMS Redoubt in the North Sea on 10 August 1918. An hour later, the German Zeppelin LZ.53 was intercepted and destroyed while flying at 19,000 feet, putting an end to this unchallenged harassment of the British Fleet. LZ.53 was the last Zeppelin destroyed in WWI and Culley’s Camel ditched along side the Redoubt and was recovered.

This aircraft survives today and hangs in the Imperial War Museum in London, England.

More information on these 58ft towing lighters can be found here:
http://bumaritime.org/projects/58ft-towing-lighters/
https://en.wikipedia.org/wiki/John_Cyril_Porte#War_service
https://en.wikipedia.org/wiki/Charles_Rumney_Samson#First_World_War

The print is available from:
https://keithferrisart.com/product/just-airborne-at-sea-lithographic-print-19-12-x-23-le-750/

17 December 2017

Battle of Beersheba (1917)

The centenary of the Battle of Beersheba occured in October, but for various reasons Mark wasn't able to run the game until the League meeting today. Andrew, Django, Ian and James took control of the ANZACs with Peter and I defended with the Turks.

Mark was interested in recreating the battle as this was the last real major charge by a British mounted force (and a legendary Australian success - refer to the 1987 film 'The Lighthorsemen' with Sigrid Thornton) and one truly deserving of being remembered and honoured.

We used Warhammer Historical's Great War with 28mm miniatures (from a range of manufacturers form Mark's extensive collection) with modifications to the rules to simulate the charge. The real battle was a race against time to secure the wells before Turks and Germans could blow them up.


The ANZACs had 3 units of light horse, 1 unit of (British) Yeomanry, 2 units of dismounted ANZACs and some artillery. The Turks had 6 units of infantry, 2 HMGs, artillery and a small unit of German engineers guarding the wells.

Here are some photos from the game, starting with an overall view of the table:


The view of the Turkish artillery towards the east:


Turkish peasants relaxed in their trenches:


Looking slightly less relaxed (I was reminded of that charging scene in 'Monty Python and the Holy Grail'):


The final charge after the Light Horse were able to break through to get to the German engineers and cut them down (bastards):

Typical of the British, they let others do the hard work and then came in at the end and tried to snatch some glory:


All in all another great game and a good end to gaming in 2017.

23 August 2017

The Fokker Scourge 1916

My planned game this month fell through, so I joined the large multi-player Wings of Glory event that was being hosted by Trevor from the Nunawading Wargames Association. All the WWI airplanes were supplied along with the beautiful terrain that he had made.

The mission was simple:

Oberleutnant Max Immelmann
Feldflieger Abteilung 62

Your orders are to patrol above the trench lines in sector 23456e and support allied Roland aircraft of FFA 229b engaged in attacking the British ground forces. FFA 229b has been attacking without any resistance for the last four days, but it is suspected that the British will soon send scounts to stop them. Protect the aircraft of FFA 229b from British scout attacks.


Available aircraft:
x4 Fokker E.III
x2 LFG Roland C.II

We deplayed first, with the British then appering anywhere (they had dropped out of the clouds).


The game was a lot of chaos, fun and the terrain was a real pleasure to play on. The buildings were Brigade Models and the aircraft were Ares' Wings of War / Wings of Glory 1/144 scale miniatures. I wasn't able to play in the afternoon games, but definitely has me thinking I should pull this game out again.