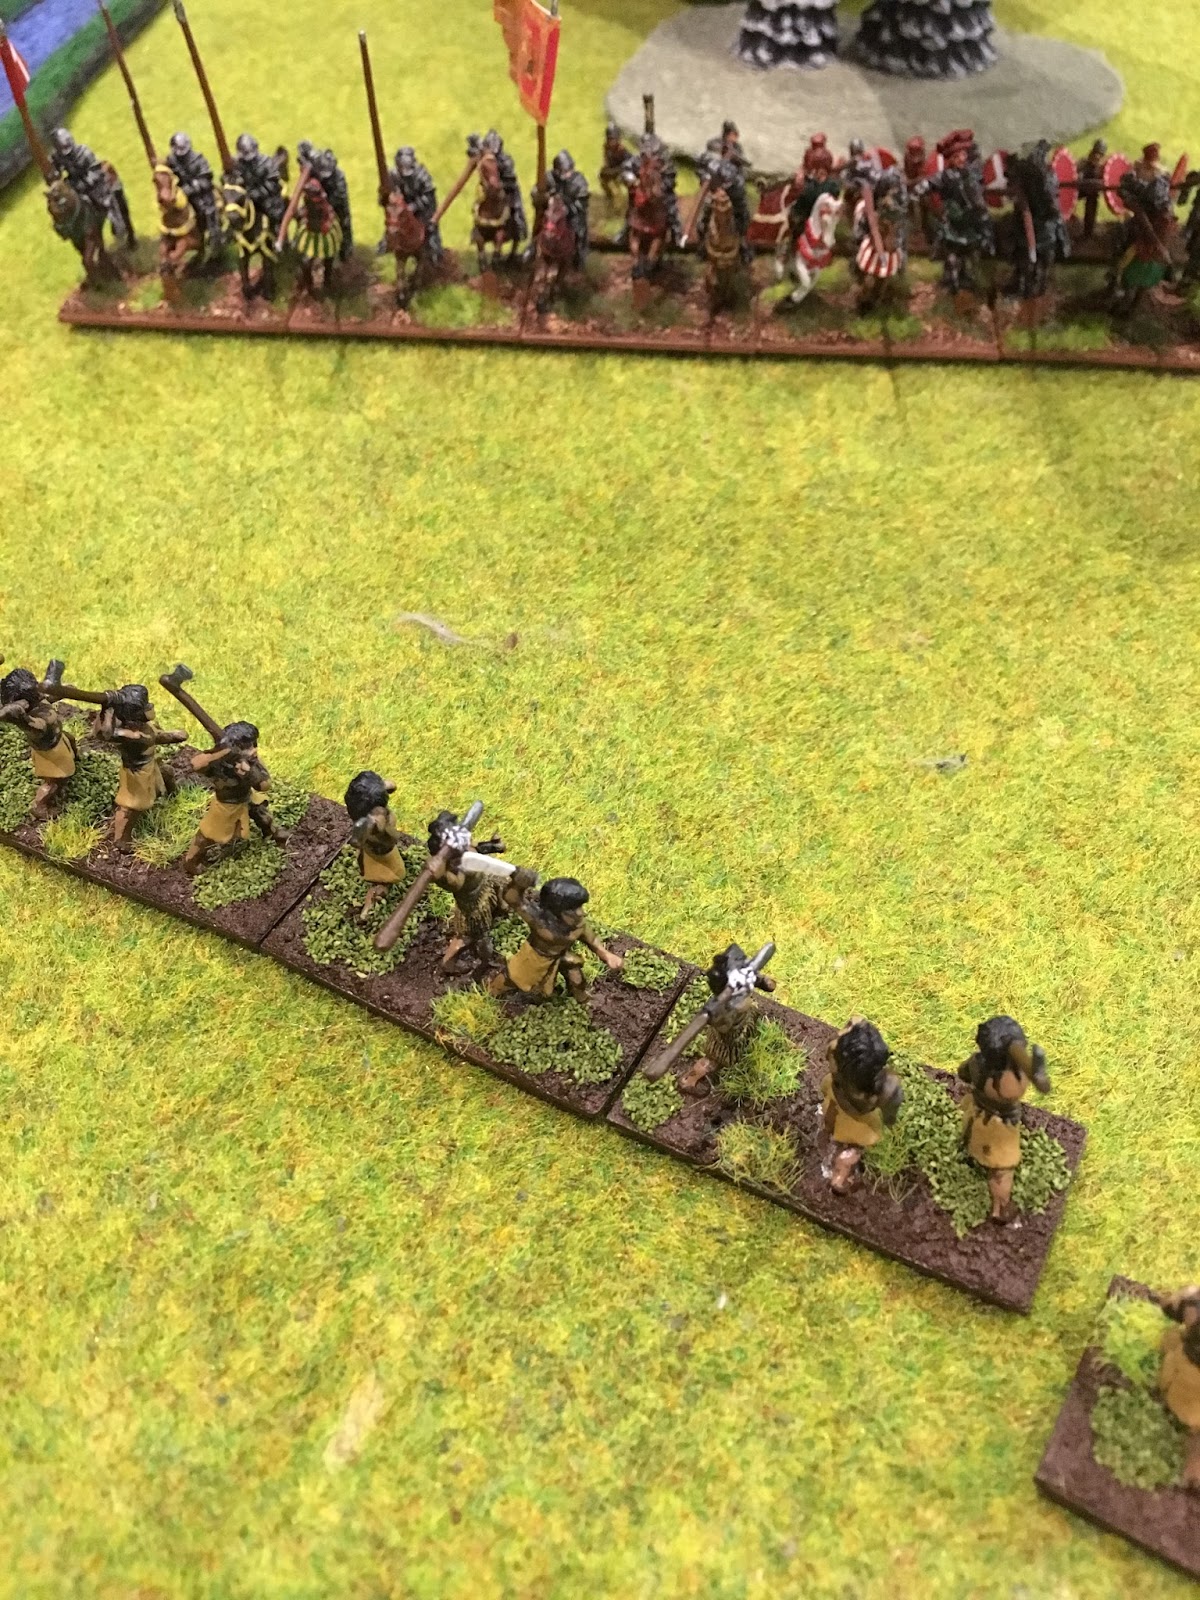
The League of Ancients ran its annual ancients tournament over the
weekend. It was the second year of using 'L'Art de la Guerre' (ADLG)
third edition rules. This year armies were restricted to 15mm 200 point
armies drawn from the Dark Ages, Feudal Ages and Late Middle Ages lists.
I took a Medieval German (227) army consisting of:
Army Corps I
C-in-C Frederick III, the Peaceful (Ordinary) (0)
x4 Heavy Knight impact (Ordinary) (52)
x2 Heavy cavalry firearm (Ordinary) (22)
Army Corps II
S/gen Louis, Duke of Savoy (Ordinary) (0)
x2 Heavy Knight impact (Ordinary) (26)
x2 Heavy cavalry impact (Ordinary) (20)
x4 Crossbow (Ordinary) (28)
Army Corps III
S/gen Tully Bascombe (Ordinary) (0)
x4 Pikemen (Ordinary) (44)
x2 Light infantry firearm (Ordinary) (8)
As
you can see, a pretty ordinary army. Having only had four games
previously under my belt, it was a good learning opportunity. What
follows are pictures of mostly my army's backs (not such a bad thing -
that's how I want to be seeing them during a game) and them being
thrashed (I didn't win a game!). In all 21 people played over the
weekend (some only on the Saturday or the Sunday), with a mix of armies.
The lists of armies were:
Feudal Spanish (148)
Beja (162)
Feudal German (183) x2
Later Crusader (187)
Teutonic Knights (209) x2
Later Samurai (210)
Medieval Scandinavian (221)
Feudal Scots (222)
Medieval Scots (222)
Hundred Years War English (225) x2
Medieval German (227) x2
Medieval Spanish (228)
Free Company (230)
Burgundians (231)
French Ordonnnance (234) x2
Burgundian Ordonnance (235)
In
the morning on the Saturday I faced Alex I's Medieval Scandinavian
(221) and lost 96 - 14 (he would go on to be the overall winner).
In the afternoon I faced Andrew W's Feudal German (183), losing 95 - 15.
On
the Sunday morning I faced Andrew O's Hundred Years Wars English (225).
Lots
of Lb. And stakes. I was wearing him down (he had a few units with
cohesion markers), but it was not quickly enough, losing 99 - 11.
In the afternoon I faced Peter C's Burgundians (231). This was another close game
(the the final score doesn't truthfully reflect the closeness of the
game. Honest! I lost 95 - 15.
Another
well run tournament, things went pretty smoothly (three playing umpires
were in use again and worked well). While I didn't get anywhere near
the podium (okay, I was second last, but only because the player in last
place only played two games). I did win the player's choice for best
painted.
The guy on top is charming - I'll have to find out where he's from.
Edit: the drinking Saxon is from Wargames Foundry's SAX005 - Saxon Shield Wall Characters set:
https://www.wargamesfoundry.com/products/sax005-saxon-shield-wall-characters
All
in all a fun weekend, doubling my number of games of ADLG I've now
played, making me a lot more comfortable with the rules. More a
definitely on the horizon.
23 November 2017
07 November 2017
Cup Eve DBA Tournament
Every year the Monday Knights host a DBA tournament. It's a lot of fun and gives people an opportunity to paint and field ancient and medieval armies relatively easily. Version 2.2 was my introduction to the period 10+ years ago (where I had only played Games Workshop games and Flames of War up until then).
I love the game for its simplicity (but not the simplicity of the language the rules are written in!), and the ability to field interesting armies from history. The open book tournament used version 3 of the rules, including normal terrain set up. I decided to field IV/12e Maori as I painted them 3-4 years ago and never fielded them in a game.
The miniatures are from Battleline Miniatures in New Zealand. The sculpts are okay, needed a lot of cleaning up, but there's next to no choice out there, but I'm happy enough with them (as I'm slowly collecting Pacific armies or ones that adjoin it).
Anyway, onto the games. In the first game my 12 Blade army faced Ed with an army of Elephants (Burmese or Tamil I think). Was a nightmare. Lost 10-2.
Game two was against Django and his Ptolemaic (II/20c) army with a little bit of everything. Struggled to take down the pike in difficult terrain, but managed to survive longer than I should have in the open against Knights, lost 9-3 (there's a pattern forming).
Game three saw me face Steve and Italian Condotta (IV/61). I thought a littoral landing would be cool and I hadn't done one in years. Cool doesn't win you battle kids (particularly if your opponent does it better than you), lost 8-4 (I lost 5 elements, mostly to the Knights).
All in all was good to finally play version 3 after not playing DBA for a few years. I plan to play at Cancon in January next year - so time to paint and play with something with more flexibility. Tibetans maybe, or Malays. Not sure yet.
I love the game for its simplicity (but not the simplicity of the language the rules are written in!), and the ability to field interesting armies from history. The open book tournament used version 3 of the rules, including normal terrain set up. I decided to field IV/12e Maori as I painted them 3-4 years ago and never fielded them in a game.
The miniatures are from Battleline Miniatures in New Zealand. The sculpts are okay, needed a lot of cleaning up, but there's next to no choice out there, but I'm happy enough with them (as I'm slowly collecting Pacific armies or ones that adjoin it).
Anyway, onto the games. In the first game my 12 Blade army faced Ed with an army of Elephants (Burmese or Tamil I think). Was a nightmare. Lost 10-2.
Game two was against Django and his Ptolemaic (II/20c) army with a little bit of everything. Struggled to take down the pike in difficult terrain, but managed to survive longer than I should have in the open against Knights, lost 9-3 (there's a pattern forming).
Game three saw me face Steve and Italian Condotta (IV/61). I thought a littoral landing would be cool and I hadn't done one in years. Cool doesn't win you battle kids (particularly if your opponent does it better than you), lost 8-4 (I lost 5 elements, mostly to the Knights).
Fourth and finally game saw me face off against Gareth and New-Kingdom Egyptian (I/22a). At this stage I was regretting my poor choice of army in an open tournament; no mounted and no bad going troop types, lost 11-1 I think.
All in all was good to finally play version 3 after not playing DBA for a few years. I plan to play at Cancon in January next year - so time to paint and play with something with more flexibility. Tibetans maybe, or Malays. Not sure yet.
06 November 2017
Pop-up Globe Theatre's Henry V
"We few, we happy few, we band of brothers;
For he to-day that sheds his blood with me
Shall be my brother"
― William Shakespeare, Henry V
The other day I went to watch the Pop-up Globe's production of Henry V, Shakespeare's tale of King Henry V taking on the French army at Agincourt in the face of impossible odds. I enjoyed this immersive theatrical experience complete with spectacular and blood-thirsty battle scenes, with men in full armour wielding broadswords, longbows, garottes, crossbows, bagpipes and... a frying pan.
Pop-up Globe is a full-scale temporary replica of the second Globe, the theatre Shakespeare and his company built and opened in 1614 after the first Globe theatre burned to the ground, and more information can be found here:
https://popupglobe.com.au/
Below are some of the photos I took. If you can go, I recommend you do so.
For he to-day that sheds his blood with me
Shall be my brother"
― William Shakespeare, Henry V
The other day I went to watch the Pop-up Globe's production of Henry V, Shakespeare's tale of King Henry V taking on the French army at Agincourt in the face of impossible odds. I enjoyed this immersive theatrical experience complete with spectacular and blood-thirsty battle scenes, with men in full armour wielding broadswords, longbows, garottes, crossbows, bagpipes and... a frying pan.
Pop-up Globe is a full-scale temporary replica of the second Globe, the theatre Shakespeare and his company built and opened in 1614 after the first Globe theatre burned to the ground, and more information can be found here:
https://popupglobe.com.au/
Below are some of the photos I took. If you can go, I recommend you do so.
22 October 2017
Knights of Dice's 1889 Mignola Avenue Part 2
Work continues on 1889 Mignola Avenue. I dry brushed the "concrete" parts tones of grey:
I probably should have painted the access covers, etc at this point, but I was too impatient and wanted to glue this beauty together. I'm gushing, aren't I?
Painted the door blue as a point of difference on the model:
I also glued a sheet of clear plastic followed by a sheet of slightly textured black card for the backing of the windows and door:
I will just need to be careful I don't dirty them as I finish the rest of the build.
Next step involved gluing the inside strips of brick, ensuring they were glued the right way up:
I also used clothes pegs to ensure I got a clean fit:
The roof got a light black wash to bring back some definition:
And I glued on the side panels, ensuring just a thin layer of PVA:
Slowly getting there, but probably can finish it off in two sessions; one for the washes, one for the tufts of foliage, etc.
I probably should have painted the access covers, etc at this point, but I was too impatient and wanted to glue this beauty together. I'm gushing, aren't I?
Painted the door blue as a point of difference on the model:
I also glued a sheet of clear plastic followed by a sheet of slightly textured black card for the backing of the windows and door:
I will just need to be careful I don't dirty them as I finish the rest of the build.
Next step involved gluing the inside strips of brick, ensuring they were glued the right way up:
I also used clothes pegs to ensure I got a clean fit:
The roof got a light black wash to bring back some definition:
And I glued on the side panels, ensuring just a thin layer of PVA:
Slowly getting there, but probably can finish it off in two sessions; one for the washes, one for the tufts of foliage, etc.
(Mad) Maximillian 1934 Part 1
Yesterday I dropped into Eureka Miniatures and picked up (among other things) the Mad Maximillian Flyer car, running versions of the crew miniatures and the turning template for the Maximillian 1934 rules by Mana Press.
Even though (like most of us) I have other projects that need to be finished (planned games, tournaments, etc) I was keen to get started what I got:
The above photo shows all the parts you get with the Mad Maximillian Flyer (100MMX003), swapping out the driver for the female one, the female driver foot figure (100MMX009), the bareheaded male running with flimsies (100MMX010) along with the turning template for Maximillian 1934.
I also added the Double Armed Heroine, based Louise Brooks photo with the two pistols:
Not sure if she's available yet from Eureka, but she's a beautiful little figure. You can read about Ms Brooks here:
https://en.wikipedia.org/wiki/Louise_Brooks
Late last night I managed to glue the car together and started painting the template. A little fiddly, but a lot of fun!
The only mod I need to do to the resin hull was file some groves on the left and right hand side directly behind the grille to allow the front axle plate fit:
I then glued car (that'll be dubbed the Bull of Dudley Flats) onto a credit (well gift) card base and will now need to plaster the base along with those for the figures on foot:
The man holding the Lewis gun will need to have his have sculpted, and I'll probably add a few things on each of them to make them unique.
For those wanting to get their template done, instead of following Mana Press' video:
https://www.facebook.com/tribalgame/videos/1891941354153823/
A quick alternative would be just to use a black felt tip pen. I decided to go ahead with another alternative and paint mine raw umber with a highlight instead, as I wanted to do something with chalk (as the Mignola Avenue building had turned out so well).
These parts still need a spray of matt varnish, which will dull down that dustiness they now have.
I also haven't full decided on the car's colour scheme, I'm currently thinking of dark grey or black and call it the Black Bull.
Even though (like most of us) I have other projects that need to be finished (planned games, tournaments, etc) I was keen to get started what I got:
The above photo shows all the parts you get with the Mad Maximillian Flyer (100MMX003), swapping out the driver for the female one, the female driver foot figure (100MMX009), the bareheaded male running with flimsies (100MMX010) along with the turning template for Maximillian 1934.
I also added the Double Armed Heroine, based Louise Brooks photo with the two pistols:
Not sure if she's available yet from Eureka, but she's a beautiful little figure. You can read about Ms Brooks here:
https://en.wikipedia.org/wiki/Louise_Brooks
Late last night I managed to glue the car together and started painting the template. A little fiddly, but a lot of fun!
The only mod I need to do to the resin hull was file some groves on the left and right hand side directly behind the grille to allow the front axle plate fit:
The rear gunner arrangement was the most fiddly. I decided to glue everything together, as I could tell I'd need to fill gaps with Greenstuff. Particularly at the join between the support and the hull. I was impressed how well everything fitted together, it only took 30 minutes or so.
I then glued car (that'll be dubbed the Bull of Dudley Flats) onto a credit (well gift) card base and will now need to plaster the base along with those for the figures on foot:
The man holding the Lewis gun will need to have his have sculpted, and I'll probably add a few things on each of them to make them unique.
For those wanting to get their template done, instead of following Mana Press' video:
https://www.facebook.com/tribalgame/videos/1891941354153823/
A quick alternative would be just to use a black felt tip pen. I decided to go ahead with another alternative and paint mine raw umber with a highlight instead, as I wanted to do something with chalk (as the Mignola Avenue building had turned out so well).
These parts still need a spray of matt varnish, which will dull down that dustiness they now have.
I also haven't full decided on the car's colour scheme, I'm currently thinking of dark grey or black and call it the Black Bull.
15 October 2017
14 October 2017
Knights of Dice's 1889 Mignola Avenue Part 1
Last week my FLGS, Mind Games, got a huge resupply of Knights of Dice MDF terrain kits:
https://www.knightsofdice.com/store/
I had painted a few Western pieces (from some other manufacturer) a few years ago and wasn't overly impressed at the time as they didn't paint well and looked too much like theatre sets (boxy and plain). Partly my fault I think, so I decided to give this MDF terrain thing a second chance.
So far I'm glad I did.
I bought the 1889 Mignola Ave set as I'm been thinking of creating some generic urban terrain that can be used for 1930s gangster, superheroes and zombie apocalypse games:
http://knightsofdice.com/store/index.php?main_page=product_info&cPath=51_52&products_id=42
Now that, minus the graffiti, is the look I want to achieve. I didn't buy the cable-runs upgrade pack (as seen on the roof space), as I just wanted to see what the Knights of Dice kits are like. This is what it looked like when I did a dry fit:
Pretty good detail, went well together as the PDF instructions are clear. At this stage I was already happy. But how to get that final look?
The Terrain Tutor and Viv (from Knights of Dice) own videos were instructive and easy to follow. I'm basically following a mixture of these two videos:
First stage was to glue the inner walls and roof together, the front elevation molding (see below) and the front steps together. I then spray painted all the components black (I used Fiddly Bits - it's cheap and works for me). Here you can see the front elevation molding:
I then brushed a raw umber craft paint (Kaiser colour) over the brick sections, followed by a bright red dry brush (an old tub of Citadel Blood Red):
The next part was messy. Using simple chalk ($2 from the Reject Shop) I followed Viv's method:
After wiping it down, I repeat the steps two/three times in the section I missed. I skipped the dry brush stage and just sprayed matt varnish over all the surfaces once to lock the chalk in:
Things are starting to take shape, I painted the concrete sections with two/three thin coats of cool grey craft paint (Kaiser colour):
Next step will be a highlight dry brush on the concrete sections and then start to glue it all together with PVA before washes, dry brushing and tufts, etc to make it more cohesive.
https://www.knightsofdice.com/store/
I had painted a few Western pieces (from some other manufacturer) a few years ago and wasn't overly impressed at the time as they didn't paint well and looked too much like theatre sets (boxy and plain). Partly my fault I think, so I decided to give this MDF terrain thing a second chance.
So far I'm glad I did.
I bought the 1889 Mignola Ave set as I'm been thinking of creating some generic urban terrain that can be used for 1930s gangster, superheroes and zombie apocalypse games:
http://knightsofdice.com/store/index.php?main_page=product_info&cPath=51_52&products_id=42
Now that, minus the graffiti, is the look I want to achieve. I didn't buy the cable-runs upgrade pack (as seen on the roof space), as I just wanted to see what the Knights of Dice kits are like. This is what it looked like when I did a dry fit:
Pretty good detail, went well together as the PDF instructions are clear. At this stage I was already happy. But how to get that final look?
The Terrain Tutor and Viv (from Knights of Dice) own videos were instructive and easy to follow. I'm basically following a mixture of these two videos:
First stage was to glue the inner walls and roof together, the front elevation molding (see below) and the front steps together. I then spray painted all the components black (I used Fiddly Bits - it's cheap and works for me). Here you can see the front elevation molding:
I then brushed a raw umber craft paint (Kaiser colour) over the brick sections, followed by a bright red dry brush (an old tub of Citadel Blood Red):
This
was then followed by a rough dry brush of Vallejo Stone Grey (70.884). I
was experimenting on the section that I knew would be covered by the
other components, mainly trying to get a range of colours and textures:
The next part was messy. Using simple chalk ($2 from the Reject Shop) I followed Viv's method:
After wiping it down, I repeat the steps two/three times in the section I missed. I skipped the dry brush stage and just sprayed matt varnish over all the surfaces once to lock the chalk in:
Things are starting to take shape, I painted the concrete sections with two/three thin coats of cool grey craft paint (Kaiser colour):
Next step will be a highlight dry brush on the concrete sections and then start to glue it all together with PVA before washes, dry brushing and tufts, etc to make it more cohesive.
Subscribe to:
Posts (Atom)